Social Media Outreach Guide
NOTE: This guide is currently under review and is likely to change.
We owe to our donors to communicate the impact of their donations in a transparent and orderly fashion. To achieve this, we should try our best to communicate updates at the following intervals:
Daily #
These updates should be processed everyday.
Well Wishers and Social Media #
We want our donors to stay updated with daily progress
- Make a list of major progress, including but not limited to:
- Funds Raised
- Distributions completed
- Distributions planned
- Major Partnerships formed
- Share this on central channel for approval
- Edit and include any suggestions
- Send it to well wishers group
- Post an insta story - This will also post to facebook automatically
Internal Updates #
Create minutes of internal meetings and note down:
- Current targets
- Current problems
- Ideas and Experiences
Con-call story goes to IG and FB #
Click a picture of as many people as possible, while on the call and post it to Instagram
As need be #
Funds raised #
Create a video using the Canva template to share on FB and Insta, to communicate the impact of funds raised so far
Distribution updates #
Every time we do a new on-ground material distribution, we publish an update on our website and posts across social media.
How to design #
Use the Photoshop template available on the shared Google Drive (download PSD) and edit is as follows:
Before you start with the following process, make sure you have the typeface Hind installed (available on Google Fonts). Hind is designed by the Indian Type Foundry and we use the Hind bold font in our posts.
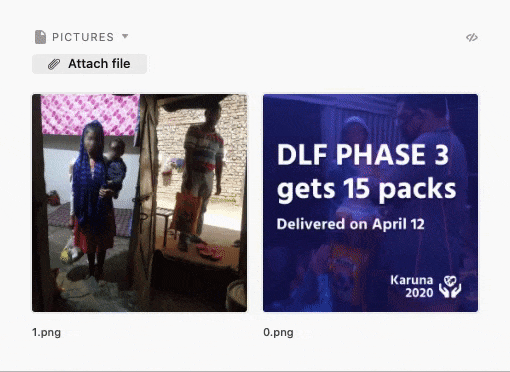
After designing the posts, upload them to Airtable under “Social Media Outreach” and move the card to “Photos uploaded”. Make sure the file names are “0.png”, “1.png”, “2.png” and so on, making sure “0.png” is the main cover photo. This is because we alphabetically sort the file names and use the first photo as the cover.
Quick checklist #
- Replace the lowest layer with the background image with the best-looking distribution photo
- Change the colors of the two overlay layers with a unique color, ideally one that hasn’t been posted recently
- Increase or decrease the opacity of the color layers, making sure image details aren’t lost; make sure the lower color layer has a high opacity and the upper one has the lower opacity
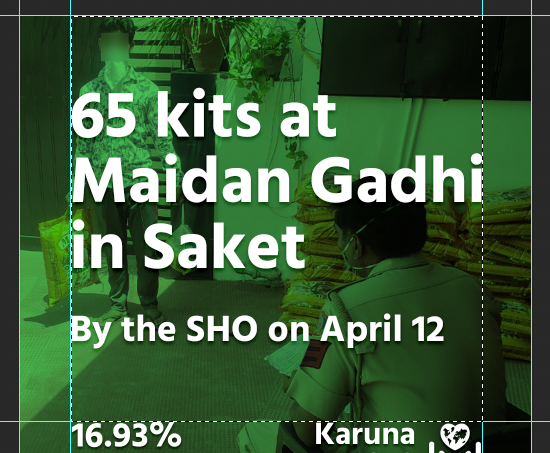
- Update the title and subtitle text on the post
- Export a 1024px square PNG by selecting “File” → “Save to Web”
- Optionally, create another 1024px canvas and make a collage of other photos
Tutorial #
Open the post-template.psd file in Photoshop, then begin by updating the text, images, and colors, following the “Quick checklist”.
Always make sure that the template’s rulers are respected. There should be 100px in padding on each side, left and right:

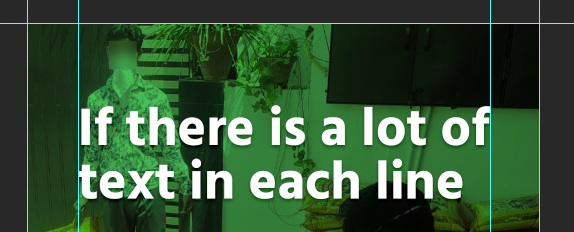
When you update the main text, make sure it fills up the space between the rulers:
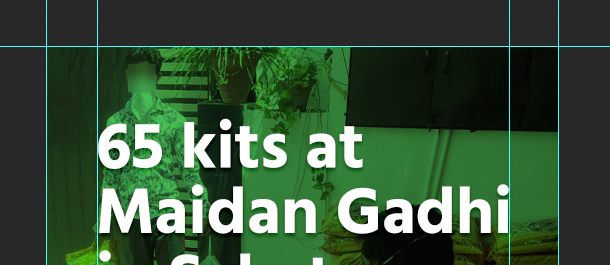
Even if you have longer text, decrease the font size and make sure it fits between the rulers:
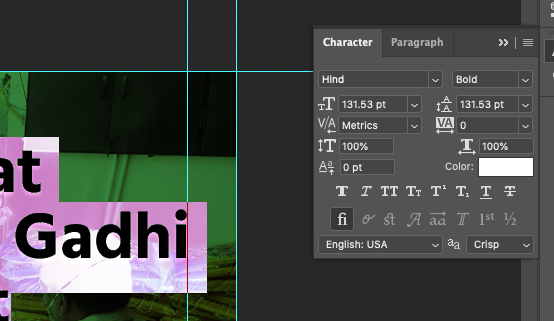
However, the maximum font size is 140 pt. If the text is still short, align it to the left ruler:
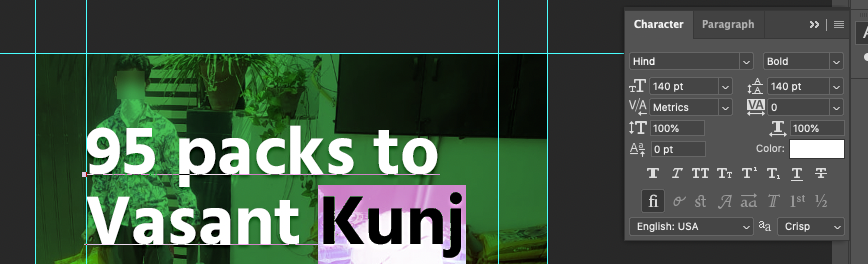
If you change the font size of the main text (which you probably will), make sure you change the line height as well (they should be equal). In the following example, they are both set to 131.53 pt.
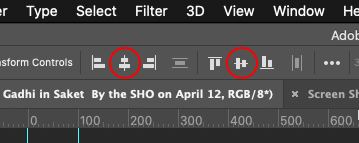
Make sure the text is in the visual center of the available space. To do this, first select the “square” made by the rulers:
Then, make sure you are on the text layer, and align it in the center middle of this box. To do this, select the Move tool (V) and click on the buttons for “center” and “middle” alignment in the top toolbar:
When publishing the cover on Airtable, reorder to make sure the cover photo is the first image:
How to post #
- Log in to Instagram using the shared credentials in the “Tech & Marketing” group description
- Select the post, ideally with one “cover” image and other normal photos
- Don’t apply any additional filters, use the “Normal” mode since posts are pre-designed
- Add a caption and hashtags (use previous posts and inspiration)
- Add the distribution location to the post by selecting “Add Location” (not applicable to non-distribution posts)
- Under “Post to Other Accounts”, select “Facebook”, making sure no other option is selected
- Click on “Post”
Well Wishers group on WhatsApp #
- Wait for the website to update (or trigger an update) so new posts are available
- Upload the cover photo of the post to WhatsApp
- In the photo caption, add the first paragraph of the Instagram caption
- After a new line, add 🌏 (Earth Globe Asia-Australia Emoji) with the link to the post
Social media posting system #
We have systems set in place that cross-post to different social media services. The source of truth for posts is the Instagram profile @karuna2020_org. Therefore, we only need to post on Instagram and other places like Twitter and Facebook with auto-populate using the following workflows:
- Facebook: Instagram’s native integration with Facebook helps us cross-post
- Twitter: tweet.photo is a service that picks up Instagram photos and cross-posts them on Twitter, using native photo uploads and keeping the caption and hashtags; Instagram’s native Twitter integration doesn’t post photos, only links to the Instagram post
- Twitter and Facebook: IFTTT also periodically checks the update RSS feed and posts new update article links in both Twitter and Facebook
Why is Instagram the source of truth? #
We’ve explored services like Buffer that let you schedule and cross-post, but they are unaffordable for our use case; we would rather spend the money on ration and distribution. Furthermore, Instagram does not have an easy-to-use API to post, so we need to manually post. Lastly, Facebook and Instagram have a pretty nice native integration for cross-posting.
Website posting system #
Our site is configured to automatically fetch data from Airtable and publish it under the updates section. The “event” field becomes the tile and “notes” field become the body of the post.
If the post is linked to a distribution, all the attached distribution pictures will also be posted on the website. As a precaution, ensure that all faces in distribution pictures are blurred before moving the card to “Publish to website” column.
A distribution date is required for a card to reflect on the website. This date is a field on the linked distribution card.
All changes made to Airtable will reflect on the website in 15-20 minutes.